Sunday, June 23, 2013

Reversible Car Seat Cosy - Tutorial

I had a request from my DD for a car seat cover that would double as a blanket, and as a screen for keeping the sun from baby R's sensitive eyes.

I took inspiration from the  Sophie Car Seat Quilt,

You need :

1 Charm pack   - I used Bungle Jungle by Tim and Beck for Moda
10 additional 5 inch squares in coordinating colours, I used assorted Kona solids
1 yd fabric for sashing and binding  - I used Kona Aqua
batting, approx 30 inches square

Lay out charm squares into rows, 5 squares wide and 5 squares long.


Cut strip of sashing, 1.25 inches wide  x WOF. You need 3 of these.
Subcut into 5 inch lengths x 20

Sew sashing between squares and then sew the squares together into rows.


Now cut sashing 1.25 inches wide x 26 inches. Cut 6 strips like this. Join a sashing strip to the bottom edge of rows 1 - 4, and then sew all the rows together.

Take the last two strips of sashing and sew them to the top of Row 1, and the bottom of Row 5.

The quilt top is finished!

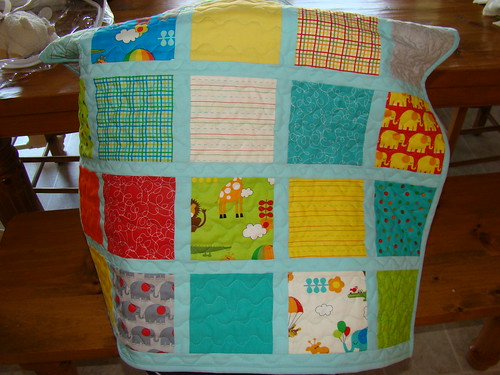
 Next you will make the back exactly the same way as the front. I wanted the quilt to be reversible, so that the fold over at the top has my cute charm squares showing. If you don't want to do this, use a piece of fabric 28 inches x 30 inches for the back.

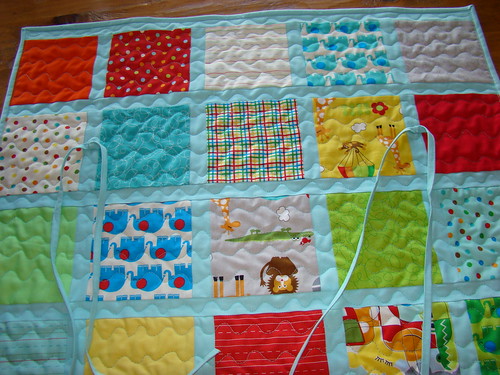
Sandwich quilt top, batting and quilt back, matching edges as closely as possible so that the squares on the front and back match up. Since some of my squares are directional I sewed the back on upside down, so that when folded to the front the squares are the right way up. See the elephants in the last picture?  Pin in place.


Quilt through all 3 layers. I used a wavy free motion design.


Trim edges and put on the binding. I used 2.25 inch wide folded in half. You need WOF x 3.

Next are ties to hold the quilt on the car seat. You could use Velcro or elastic. I like the look of the ties. I used scraps of my 1.25 inch cuts, and I made 2 ties, 34 inches long each.  Iron the strip in half, open it out, and fold the outside edges in to the middle. Then iron it all closed with the two long folded edges together.
Sew it closed.

I placed the ties 8 inches from the top of the quilt and 5.25 inches in from the edge. I sewed the tie in place in the middle of the tie. 


Here is the finished quilt with both ties in place.


DSC05393

Now tie it in place in the car seat.


DSC05394

Flip the top of the quilt up and onto the car seat hood to keep out bright sun. 


DSC05395

Lastly slide the ties up the handle and flip the bottom edge onto the hood to get the baby in and out.


DSC05396

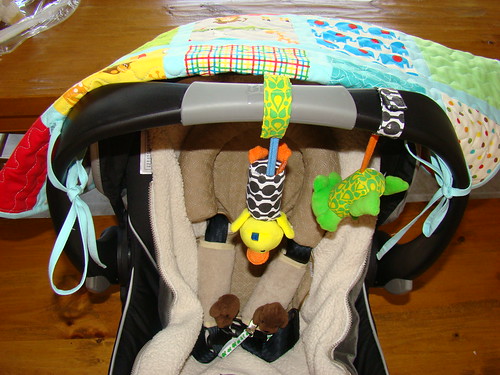
Here is the car seat cosy in use!


DSC05397

Till next time,

Sue


Linking to:

WIP Wednesday at Freshly Pieced

Saturday, June 15, 2013

T-shirt quilt - finished!

At last, another finish in 2013. We are half way through the year, and although there haven't been as many finishes as I had hoped, I'm still happy with my progress.

These T shirts are very precious to my DS, and I was nervous cutting them up for my first ever T shirt quilt.
I asked for advice, watched Youtube, and finally took the plunge and cut. Have I mentioned that my usual mistakes are related to cutting? I had been told to fuse and then cut to size. Instead I cut, fused and then trimmed to size. Luckily there were no disasters.

I was also advised to cut all the blocks the same size.


DSC05362

 You can see how well I take advice!  I pieced the centre and then placed blocks around that.
Here's a look at my calculations, they make me smile! There's probably a computer way to figure this out (EQ7?), but I like a diagram.


Tshirt front

Then, not content with this headache, I did the same thing on the back!


tshirt back

All those numbers just to evenly place 5 blocks of 3 different sizes.
Here's how it looks:


DSC05363

I usually try to quilt all my own quilts, but in this case I took it to the longarmer, and I love the result!
I think it really adds to the quilt without overwhelming it. It's also just the pattern I had in mind.

Till next time,

Sue

Monday, June 10, 2013

Retreat Production

I'm just back from a wonderful quilt retreat at a lodge on the Bow River. Four nights and four full days, wonderful food and lots of laughs with  a great group of quilters. It's amazing how much you can accomplish when your only responsibility is to sew an accurate 1/4 inch seam!

I took one new project, a quilt top for my DD. I would have finished the top, except I ran short of one of the fabrics. By only a few inches, grrr! So I'm a row of blocks shorter than I planned until we get a bit more.


This is a poor picture of the block, taken while ordering from the quilt store.  Framed boxes - the focus fabric is above, a very pretty swirl. I ran short of the background of the lower box.

I took several UFOs with me. My Swoon quilt has been sitting around waiting for me to finish it. This is the month to do it! I handed myself a couple of real challenges with this quilt. Not content with the Swoon block, I resized it into small, medium and large blocks, without thinking how hard that would be to put together. I also chose this as my first (and only, so far) attempt at Quilt As You Go.


These are the blocks I worked on, four medium and three small. All sandwiched and quilted. Next they have to be squared up and joined together. A  task for another day!

I'll save the rest of my sewing for another post.

Till next time,

Sue