Thursday, February 28, 2013

Erik the Red

That's the name of my new quilt. It's Viking themed, and several of these little guys have red beards. Authentic, right?


Why Viking?  you wonder.  Well, our family lived for some years in the very North of Scotland, just where the Vikings landed. We're big hearty people, and we identified strongly with those Vikings, whether we have any in our family tree or not!

As soon as I saw this fabric from Timeless Treasures I knew I had to have some. Unfortunately I went overboard and bought enough for several quilts! Now we're waiting for the birth of a little boy, it seemed a good time to get it out and make him a quilt.

I decided I wanted to showcase the print, but a little bit differently. The pattern I used is called
Baby Lattice Quilt and is in the Moda Bake Shop. I seriously underestimated the time it would take to fussy cut the Vikings in their longboats and the map in the correct orientation. Hours!

I can certainly recommend this pattern, specially for charm squares in a non-directional print!
It went together quickly, I only started it on Saturday. I'll be sandwiching and quilting over the weekend.

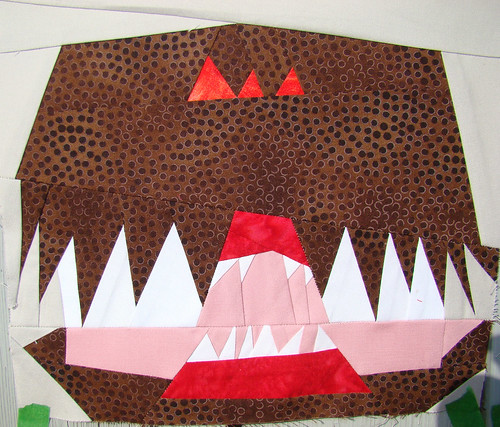
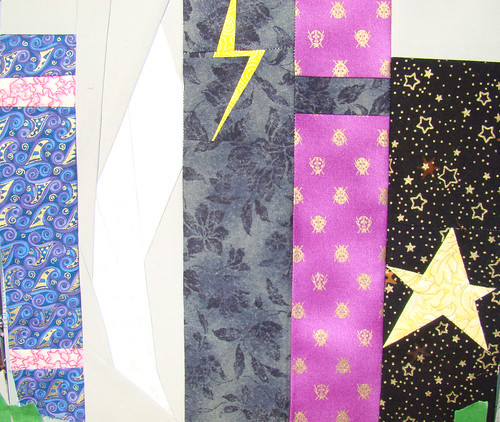
Here are two closeup pictures of some of the detail:


Linking to February NewFO at Cat Patches
Cat Patches

Let's Make Baby Quilts

Let's Make Baby Quilts! 
Thank Goodness it's Finished Friday at Quokka Quilts


Till next time,

Sue


Tuesday, February 26, 2013

Blood, Sweat and Tears

I feel like there should be a drum roll in the background, as I reveal this finish. It's my Hunter Star quilt, now renamed "Northern Lights".

Although my fingers didn't actually bleed during the making of this quilt, there was a lot of unpicking of seams, rearranging of blocks, and changing of approach. Blood, Sweat and Tears, you might say, without the blood!

During the whole process I veered wildly between optimism for this quilt, and outright dislike. Now it's finished I feel like the mother of a difficult toddler who has finally grown up into a lovely person. It's almost a surprise!


The back took a whole day at a quilt retreat to piece. I had a lot of triangle units made that were rejected for the front because of the layout. So I made them into blocks and put them on the back.


Here is a shot of the back. Another row with two blocks is not visible.

It was longarmed with an all over swirly, scrolly type design and bound in a pale green batik.
I know, I talked about the importance of binding, but I had some green left over, and I was in a fever to give the quilt to my DD#1.

Linking to:


from blank pages...

WIP Wednesday at Freshly Pieced


Till next time

Sue

Wednesday, February 13, 2013

Postage Stamp

I can cross another WIP off the list! My postage stamp quilt was started in Jan 2011. I joined a quiltalong hosted by Rachel Griffiths of ps I Quilt. She has such a creative and interesting blog, and her quiltalong was lots of fun. She showed us how to make a postage stamp quilt from strip sets of jelly roll strips. I used Blush by Basic Grey for Moda.

I remember sandwiching the quilt, and there it sat for almost 2 years, until I tripped over it one too many times!

The quilting is simple, straight line on the diagonal. I now think that this dogwood pattern from Elizabeth Hartman's blog, Oh Fransson, would have looked very nice. Lots more work, of course, but very nice. Next time. I did some FMQ on the border, ivy leaves that sometimes looked like maple, and sometimes oak, and sometimes nothing from a tree. One whole side had to come out because of tension problems on the bottom. I solved that with a new needle and re-threading my machine. These are the joys!

The border has a dark pattern, and was very hard to mark. What do you use? I tried everything, and the white mechanical pencil seemed the best choice.

And lastly the binding went on: Kona Aqua. I just love how this looks. I completely lightens up the edges of the quilt. I don't think any of my bindings have ever struck me as making such a difference. I will pay more attention to binding in future.

Here's the back:


The main fabric is a Kaffe Fassett shot cotton. I used up the rest of the jelly rolls, a total of three for the whole quilt. It measures 90" x 100".

And now on to the next WIP on the pile!

Linking to:

WIP Wednesday at Freshly Pieced

 Till next time,

 Sue

Sunday, February 10, 2013

Building Blocks

I promised myself that I would finish some long overdue WIPs. And I have! (More about that in another post!)

Meanwhile I'm satisfying my urge to start new projects one block at a time. Well that's how all quilts grow, isn't it? What I mean is, I'm making more complicated, time-consuming blocks, and then returning refreshed to the WIPs.

Here are some of my blocks:

I joined Don't Call Me Betsy's Lucky Stars BOM. Here is my February block:


Feb Lucky Stars BOM 


Here is my test block for the 3x6 Bee:

3x6 Bee Quarter 1 2013 test block


Two new blocks for my Harry Potter Bookshelf:


Monster Book for HP bookshelf
This is the Monster Book, in case you are wondering!


DSC05068
second from the left in this block is the basilisk fang, but it's white and the sunlight bleached it in the picture!

And lastly, three 12" Swoon blocks so I can try to finish that quilt too.


Swoon Block 12"Swoon Blocks 12"


Till next time,

Sue

Linking to:


Fresh Poppy Design

Saturday, February 2, 2013

Diaper bag finish

I'm so excited to have another finish, smaller than a quilt, but very satisfying!

Last year I made a diaper bag for my niece, and blogged about it here.

My DD asked for one this year, so we shopped for fabric together, and eventually found the perfect cotton print on Spoonflower. She wanted the same pattern as the previous bag, from a tutorial found on the Warehouse Fabrics blog.

It doesn't take too long to make a bag. The most trouble I had was getting the fusible fleece to stick. I had quite a time with that, and not a few bad words! The rest is just a case of following instructions and not rushing the steps in the process.

Here is the finished product:


Diaper bag


As you can tell, we have a small obsession with our Boston Terrier!

Here's the inside:


Diaper bag interior showing divider and pockets

There's a center divider, pockets on both sides, and pockets at both ends. Some have elastic to hold things like bottles.

There's lots of room in there for stuff you might need to carry!

I used a yard of black home decorator weight fabric, a yard each of the two cotton prints, and two different kinds of fusible interfacing.

And best of all, my DD loves it!

Till next time,

Sue

Linking to:
WIP Wednesday at Freshly Pieced