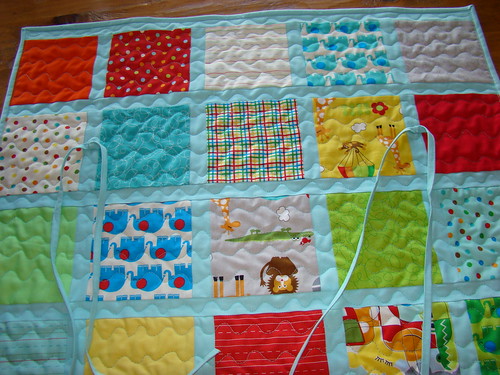
I took inspiration from the Sophie Car Seat Quilt,
You need :
1 Charm pack - I used Bungle Jungle by Tim and Beck for Moda
10 additional 5 inch squares in coordinating colours, I used assorted Kona solids
1 yd fabric for sashing and binding - I used Kona Aqua
batting, approx 30 inches square
Cut strip of sashing, 1.25 inches wide x WOF. You need 3 of these.
Subcut into 5 inch lengths x 20
Sew sashing between squares and then sew the squares together into rows.
Now cut sashing 1.25 inches wide x 26 inches. Cut 6 strips like this. Join a sashing strip to the bottom edge of rows 1 - 4, and then sew all the rows together.
Take the last two strips of sashing and sew them to the top of Row 1, and the bottom of Row 5.
The quilt top is finished!
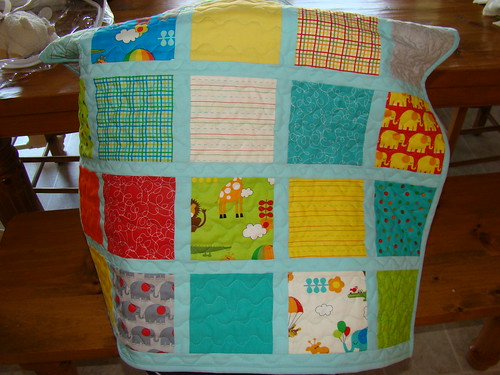
Next you will make the back exactly the same way as the front. I wanted the quilt to be reversible, so that the fold over at the top has my cute charm squares showing. If you don't want to do this, use a piece of fabric 28 inches x 30 inches for the back.
Sandwich quilt top, batting and quilt back, matching edges as closely as possible so that the squares on the front and back match up. Since some of my squares are directional I sewed the back on upside down, so that when folded to the front the squares are the right way up. See the elephants in the last picture? Pin in place.
Quilt through all 3 layers. I used a wavy free motion design.
Trim edges and put on the binding. I used 2.25 inch wide folded in half. You need WOF x 3.
Next are ties to hold the quilt on the car seat. You could use Velcro or elastic. I like the look of the ties. I used scraps of my 1.25 inch cuts, and I made 2 ties, 34 inches long each. Iron the strip in half, open it out, and fold the outside edges in to the middle. Then iron it all closed with the two long folded edges together.
Sew it closed.
I placed the ties 8 inches from the top of the quilt and 5.25 inches in from the edge. I sewed the tie in place in the middle of the tie.
Here is the finished quilt with both ties in place.
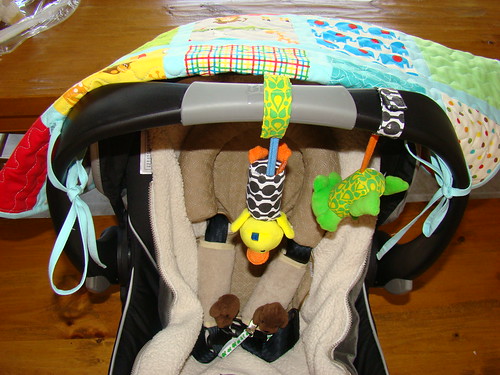
Now tie it in place in the car seat.
Flip the top of the quilt up and onto the car seat hood to keep out bright sun.
Lastly slide the ties up the handle and flip the bottom edge onto the hood to get the baby in and out.
Here is the car seat cosy in use!
Till next time,
Sue
Linking to:


Great idea...great directions for making it, thanks!
ReplyDeleteHow cute and clever!
ReplyDeleteCute, cute, cute.
ReplyDeletePretty blue background and the quilting is so cheerful!
ReplyDeleteThis is wonderful and having the ties on it is so clever!! Thanks for sharing.
ReplyDeleteFreemotion by the River Linky Party Tuesday
So clever! And very cute.
ReplyDeleteGreat tutorial! Thanks for sharing :o) Visiting from Freemotion by the River.
ReplyDelete